My Proudest Computer Repair
Background
This story is about my proudest repair from my roughly 6 years working in IT. Interestingly enough it occurred at around my 3 year anniversary, sometime in 2018! It was the culmination of a months long effort to teach myself to repair macbook motherboards(1). My interest in this pursuit was piqued when I saw how many broken motherboards we turned away, and I had become aware that it is possible to repair them by watching Louis Rossmann(2) videos on YouTube.
While this story is not the first motherboard I was able to repair, it is the first repair that I feel was entirely due to my own skill, and at no point was I in doubt of whether it was possible.
The Story
This all begins when, naturally, the customer brought in their broken computer. It seemed to charge just fine (when they plugged in the adapter the charging light would go from green to orange, indicating charging), but the computer just wouldn't turn on. The technician checking in the computer poked around a little but couldn't find anything, so they checked it in for me to take a look at it later.
When I got around to looking at it, the first thing I tried was resetting the SMC(3), which is often the culprit when a computer will mysteriously not turn on. Sadly, no dice this time around.
Next up in troubleshooting is to test each power rail to make sure they're all working. Power rails in computers honestly work kinda like highways, except they deliver power rather than vehicles. Computers have several different power rails for different voltages, since different components need higher or lower voltage. If one of these rails doesn't exist for some reason, your computer is NOT going to be happy. In fact, it might not even turn on at all, just like this one! One can test these power rails by removing the motherboard from the rest of the computer, attaching the charger, then using a multimeter to test what voltage the motherboard reads at test points for each power rail. These test points can be located using a boardview (like Google Maps for a motherboard, it shows you the names of each tiny component on the board, since the board is too compact for street signs), and the schematic, which is like the atlas for the board, showing you technical information on each component and details on how they all interact together, to assist in troubleshooting.
So, I took the motherboard out, plopped it on my desk, and started poking it. The very first rail to try is PPBUS_G3H, which should be present at all times, even when the computer is off. Almost immediately, I noticed that the area of the board I was testing was hot to the touch! I started feeling around a bit until I was nearly burned by the problem component! The culprit was a tantalum capacitor that was part of the circuitry in charge of the 3.3V and 5V rails, and there was a giant "CRITICAL" right next to it on the schematic. When I looked closer at it on the board, I even noticed that there was a gigantic crack in the thing.
That would do it!
I disconnected the power right away, then popped into the parts closet to dig around for a donor board(4). Sadly, I didn't find a donor board that exactly matched the one I was working on, but I did find a donor that was a year newer or older (I can't remember anymore, but they weren't the same) and took it back to my desk to see if it could fly. I pulled up the donor boards schematics, found the page that gave the information on the 3.3V and 5V rails, and soon discovered that the capacitor on the donor board matched the one my broken board needed! Score!
I identified the donor component on the donor board, made sure I knew the polarity of both capacitors (very important. If you do this wrong it might even break worse), and carried them both over to the soldering station. I swapped them out using a heat gun(5), tweezers, and a little flux(6). The process went seamlessly. After the boards cooled down, I stuck the donor board back on the shelf, cleaned up the spare flux from the board I was working on, slapped it back in it's computer, and it worked perfectly!

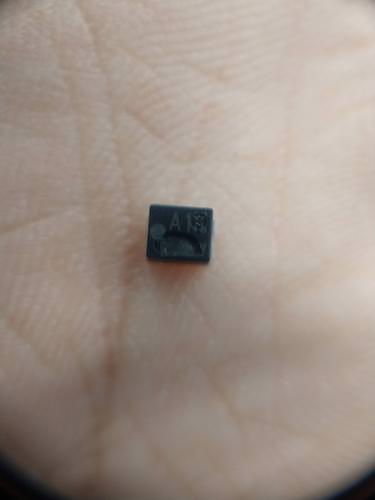
A closeup of the broken component, crack and all

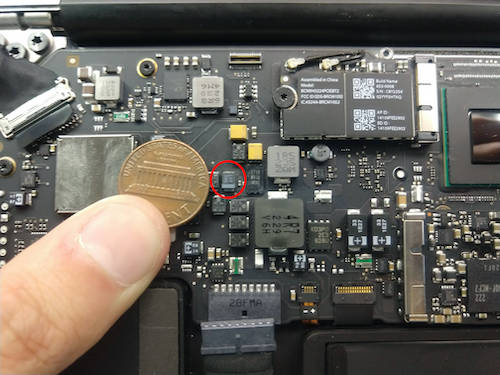
Circled is the fresh component after I swapped it in. Penny for scale!

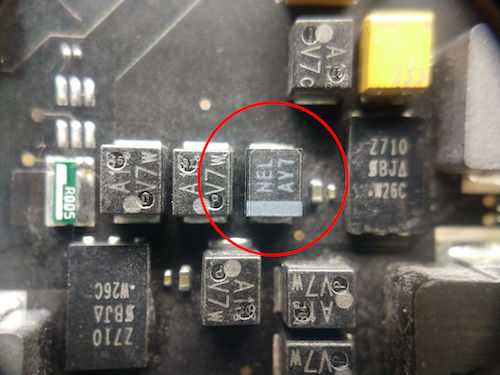
A closeup of the fresh component
The entire repair took about 30-45 minutes from start to finish, and at no point was I confused on what to do next. It was such an empowering moment for me; it really served as evidence that if I want something bad enough and work at it hard enough, I really can figure it out!
Definitions
- Motherboard - The most important component of a computer. It is a large fiberclass wafer that houses tiny components connected by copper traces (they weave through layers in the fiberglass) that connect thousands of tiny components that direct electricity JUST right to allow your computer to do all the amazing things it does. Think of it as the land a city exists on, where all the buildings are the components that perform different functions, and the roads are copper traces that move electricity from component to component.
- Louis Rossmann - A right to repair activist, repair technician, and owner of a repair shop in NYC. He has posted quite a few resources on how to repair board level issues with MacBooks.
- SMC - A chip that is in charge of a ton of important stuff, most notably being the ringleader of turning the computer on. It is the chip that is responsible for telling all the components to turn on and start doing things in the correct order when you turn on your computer.
- Donor board - A broken motherboard used to scavenge parts in order to repair other broken boards.
- Heat gun - Basically a hugely overpowered hair dryer. Rework stations are supposed to be used for board repair, which are a lot more precise, but they're also pretty expensive.
- Flux - a paste that helps clean up boards and allows solder to bind more securely.
Honorable Mentions
- Badcaps.net - Without the amazingly helpful technicians at Badcaps.net, I wouldn't have gotten far. They were so kind about answering questions when I created a thread looking for help with a problem computer! This is also where I got all my schematics from!
- Rossmann Training Guide - Without this I also wouldn't have gotten far at all. I referenced it many times while trying to remember what the heck an amplifier does. It does a fantastic job at explaining things in laymens terms.